How To Repair 4 in 1 Chainmail
Chainmail may look complicated, but repairing it is much easier than most people think. Whether your hauberk lost a ring in training or your coif snagged on a display hook, a simple 4-in-1 weave repair will have it looking solid again. This quick guide walks you through the process step-by-step with clear photos and coloured ring highlights.
Step 1: Identify the 4 in 1 Pattern
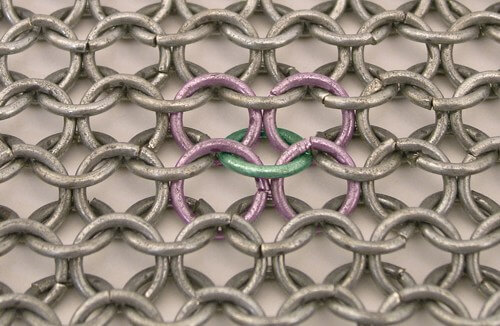
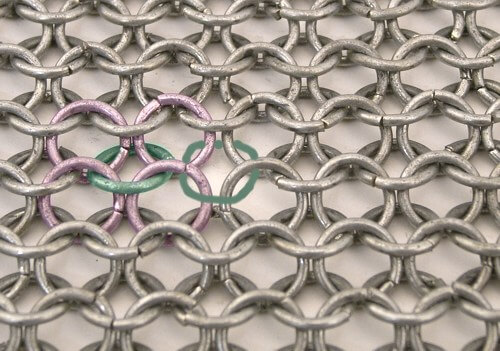
Most European chainmaille you will find is crafted in the “4 in 1” pattern. There is no mystery to the name, it simply means four rings in one ring. If you are repairing a coif, hauburk, or chain leggings it is most likely this pattern.
I have highlighted 4 pink rings inside one blue ring. With the coloured rings you should be able to see this pattern repeating itself throughout the image. If this pattern matches your item, you will need two pairs of pliers to bend the rings open and closed. Toothless needle-nose pliers work best for me, though anything will do. Missing some rings? I’ll tell you where to get them at the end of this tutorial.
Step 2: The Missing Links
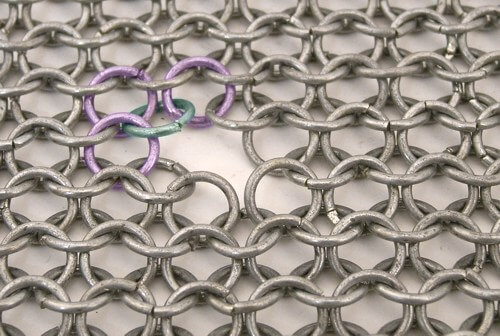
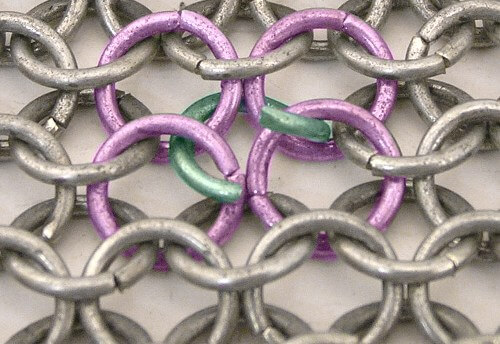
Lay your piece flat with all rings in their natural direction. By visualizing the four pink rings inside the one blue ring, I quickly discovered that I am missing one of the pink rings.
Step 3: Now We Are Ready
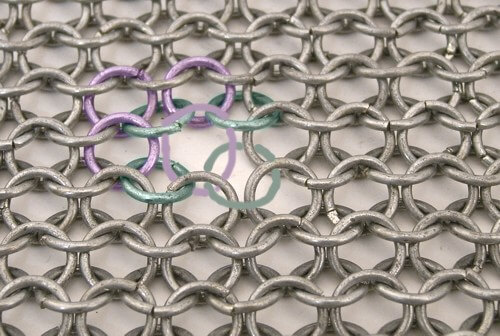
We determined that we needed to replace one pink ring. I'm no Giotto, but to illustrate, I drew the missing ring. Once drawn, it became clear that I need two rings to fix this pattern. I added a second ring for reference and to show how to weave them over and under the existing rings.
If you have trouble visualizing it, take your time. Look at the repeating 4 in 1 structure and weave through the same way.
Step 4: Close and Repeat
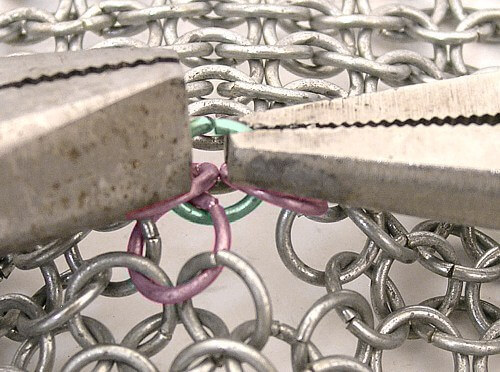
Once you’ve found the correct direction to weave your rings, grab your pliers and close the first ring. Simply bend it shut. If your pliers have teeth (like mine in this tutorial), be careful not to squeeze too tightly or you may scratch the rings.
Step 5: Last Ring
With the first ring in place, you can clearly see that one more ring will complete this repair.
Step 6: Good as New
Weave your final ring as shown, close it up, and your chainmaille is good as new! This is a simple repair that anyone can do. If you struggle visualizing the pattern, take your time, and if a ring goes in wrong, just reopen it and try again.
Where Do You Get Rings? (I'm Not Selling!)
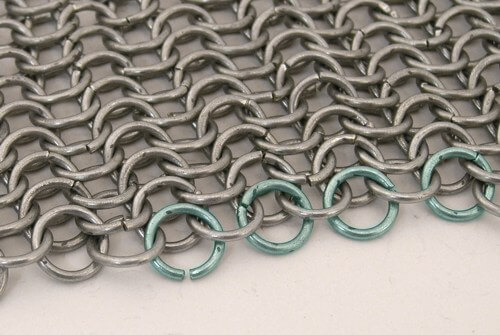
Most people assume they need to buy replacement rings. While you can find sellers online, the great thing about butted chainmaille is that you can remove an entire last row from your shirt’s waist, sleeve ends, pant legs, or the final row of your coif’s mantle. These rings match perfectly and they’re the same material, already aged to the same patina as your armor.