How To Repair A Rusty Sword
Rust on a sword looks scary, but most surface rust is completely repairable with a bit of patience and the right technique.
This guide walks you through each step so you can safely remove corrosion, restore your blade’s finish,
and protect it from rust returning in the future.
CAUTION:
You are working with a live sword blade that is designed to cut. If you feel you are unable to do this safely,
please do not attempt this repair.
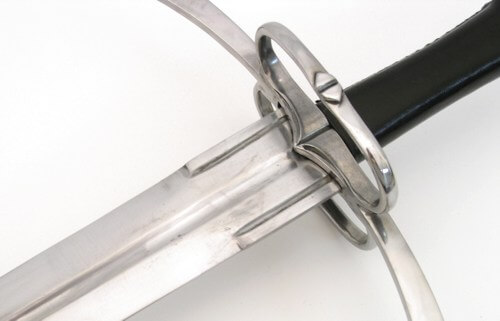
Step 1: My Sword is Rusty
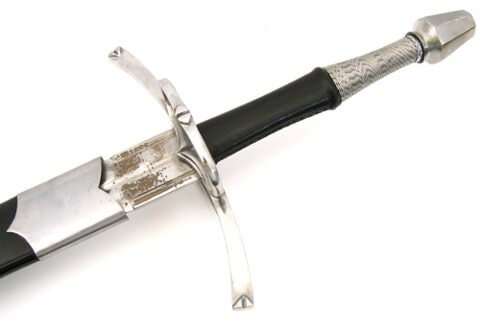
Step one is rust prevention, but by the looks of it we will skip that for this how to segment :). Rust can and will happen
if your high carbon steel sword is not cared for properly. If you find rust the best chance you have is to stop it before
it causes any more damage. It may look hopeless but with a short amount of time you can get this cleaned up and if you are
lucky, you may be able to completely restore your sword blade. These steps are intended for re-enactment stage swords and
modern functional sword blades only, not steps for restoring antique swords.
Now for the basic safety plug before we begin. Turn off the television and make sure you are free from distractions.
Do not forget that a sword is designed to cut, so be very careful during this process.
Step 2: Paper and Elbow Grease
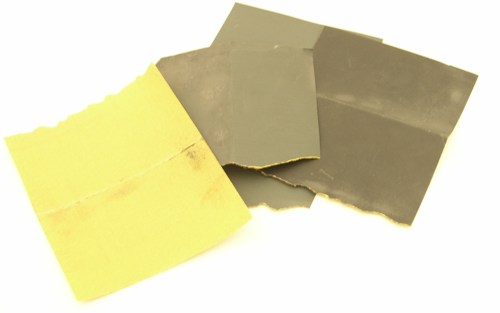
To remove the rust from this sword we used varying degrees of automotive sandpaper. We used 220, 600 and 1500 grit wet/dry
sandpaper in that order. For those who don't know and are afraid to ask, the lower the number the more coarse the sandpaper
is and you always work from coarse to finer paper.
I used these grits of paper because they are what we had on hand. I may have chosen to add a 1000 grit step if it was available
at the time I started the repair. This being said you can still achieve the same result but the final sanding will take a little
longer. The total amount of time it took to remove the rust was under 15 minutes and I was stopping to take photos during the
process.
Step 3: No More Rust
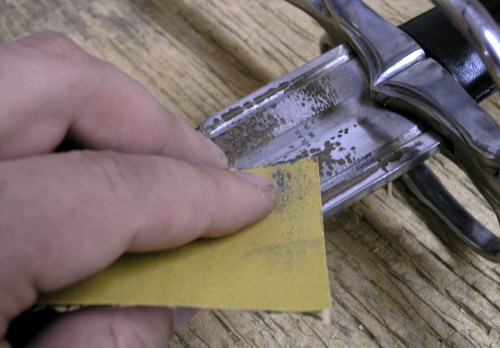
As I had mentioned we want to start with the lowest coarse sandpaper. Simply begin working the paper back and forth over the
rusted area and you will immediately start seeing results. The 220 grit will be scratching the finish on your blade which is
expected. Some people like to rub in a circular motion, or with the grain but I say do whatever feels right to you.
What we are doing is “scratching” the rust off your blade. When you are finished this step the rust should be gone.
If you can't remove it all, or there is deep pitting in the steel, it may have gone too far for complete restoration —
but you can continue to prevent further damage from occurring.
Step 4: Almost Repaired
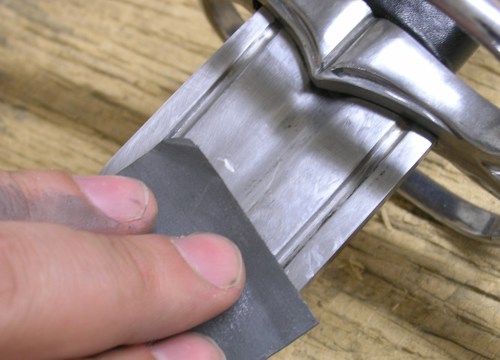
After you have removed the rust with the first step you will start again with the 600 grit. There is no more rust to remove
so what you are doing now is knocking down the scratches created by the first step. Continue sanding until they are smoothed out.
Make sure that if there are any crevices that you work the sandpaper in, ensuring no hard-to-see rust was left on the blade.
How does it look? Still see scratching or does the patch still look dull? Yes, then lets move on. No, then you can jump to
the last step right now if you are happy with the finish.
Step 5: Finished or Not Finished
Once you have knocked down the scratches and created finer scratches it is time for round three. Repeat the last process
using the 1500 grit paper. After you have worked your 1500 grit as far as it can be worked, how does it look? You can keep
working with the 1500 grit paper and the blade will start coming to a shine.
Depending on the finish of your blade and your demand for perfection will determine when you should stop. Some blades start
with a dull finish and you may have already stopped at the 600 grit step. But if your blade requires more shine you may want
to repeat with a 2000 grit or higher paper.
Step 6: Ok Really Finished
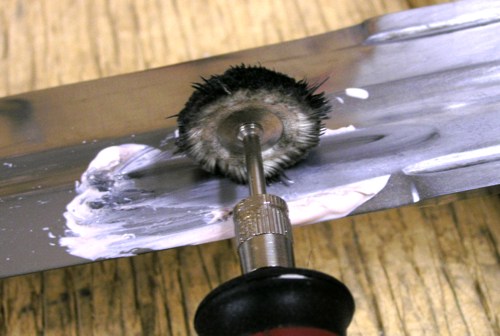
The rust is now gone and your blade is hopefully saved. If you have trouble getting it to the shine that it was you can bring
in the power tools. If you have a buffing wheel or rotary tool with a buffing attachment, use some buffing compound
(I used metal glo polishing paste) and work the blade until you achieve the desired finish.
Don't concentrate on one spot for too long because you don't want to overheat the blade which can damage the temper.
If this is a sword you use for cutting make sure to inspect it for severe pitting that can weaken the blade.
If this has occurred remember: safety first — it is time for a new sword, but this one will look great on display.
Step 7: Don't Repeat Step One
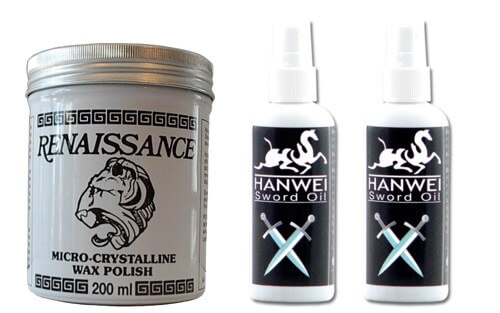
Don't repair any more rust damage — prevent it. Protect your swords with the products we use:
Hanwei Sword Oil
or Renaissance Wax.
Never store or display your swords in a scabbard. The wood or leather traps moisture which transfers directly to your blade.
It doesn't have to get wet — changes in climate and humidity can cause enough moisture to begin rusting.
Always keep them protected. Don't repeat step one.