6 Simple Steps to Build an End Grain Throwing Knife Target Board
Throwing knives can be a fun and challenging hobby, but it requires a proper target to practice on. While there are many throwing knife targets being used from tree stumps, wood plank to sheets of plywood, building your own end grain throwing knife target board is a cost-effective and rewarding easy to maintain option.
End grain throwing knife target boards are known for their durability and longevity, as they are designed to absorb the impact of the knives which helps to prevent them from bouncing back and decreases the energy absorbed by your knife tips. Moreover, they are easy to make with some basic woodworking skills and tools.
In this guide, we will walk you through the process of building an end grain throwing knife target board in 6 simple steps. I built this target in less than an hour, So, let's get started!
Materials and Tools Required
Before we dive into the steps, let's first gather the necessary materials and tools for the project:
Materials
- 2 - 2x4 wooden boards (8 feet long)
- 2 - 4x4 wooden boards (8 feet long)
- 1 - 24” x 24” piece of 1/4” or thicker plywood
- Wood screws
- Sandpaper (optional)
Tools
- Mitre saw and clamp
- Circular Saw or Jigsaw
- Drill or Screw gun
- Straight Edge (Level, Ruler, Square etc.)
- Measuring tape
- Pencil
Step 1: Cutting the Inner Target
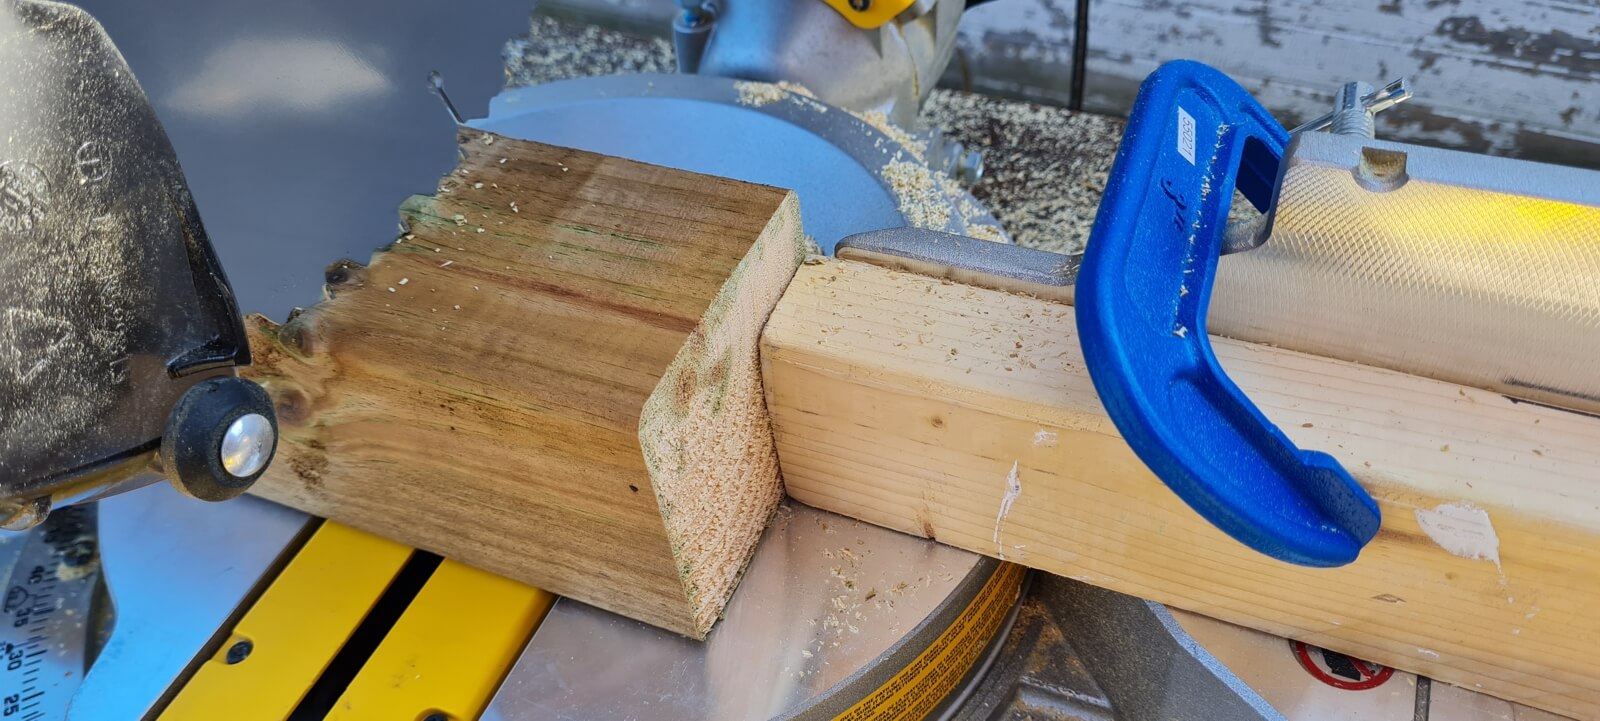
The first step is to cut the 4x8 boards into 36 equal sized pieces. The fastest method for doing this is by using a mitre saw, if you have one available. You want to create a stopper on the one side of the blade so that you don't need to measure every single piece. This will save you a lot of time and is accurate enough for this type of application. Start by measuring 3 1/2 inches from the blade and clamp a scrap piece of wood to the mitre fence so their is exactly 3 1/2” between the blade and the stopper. Time to cut! Grab a 4x4 and place it on the mitre table, slide it to the stopper and cut your first piece. Repeat this 35 more times and you will have all the pieces you need to construct the inner target. There will be extra 4x4 left that you may want to cut as well for replacement pieces as the target starts to wear from use.

Step 2: Layout your pieces
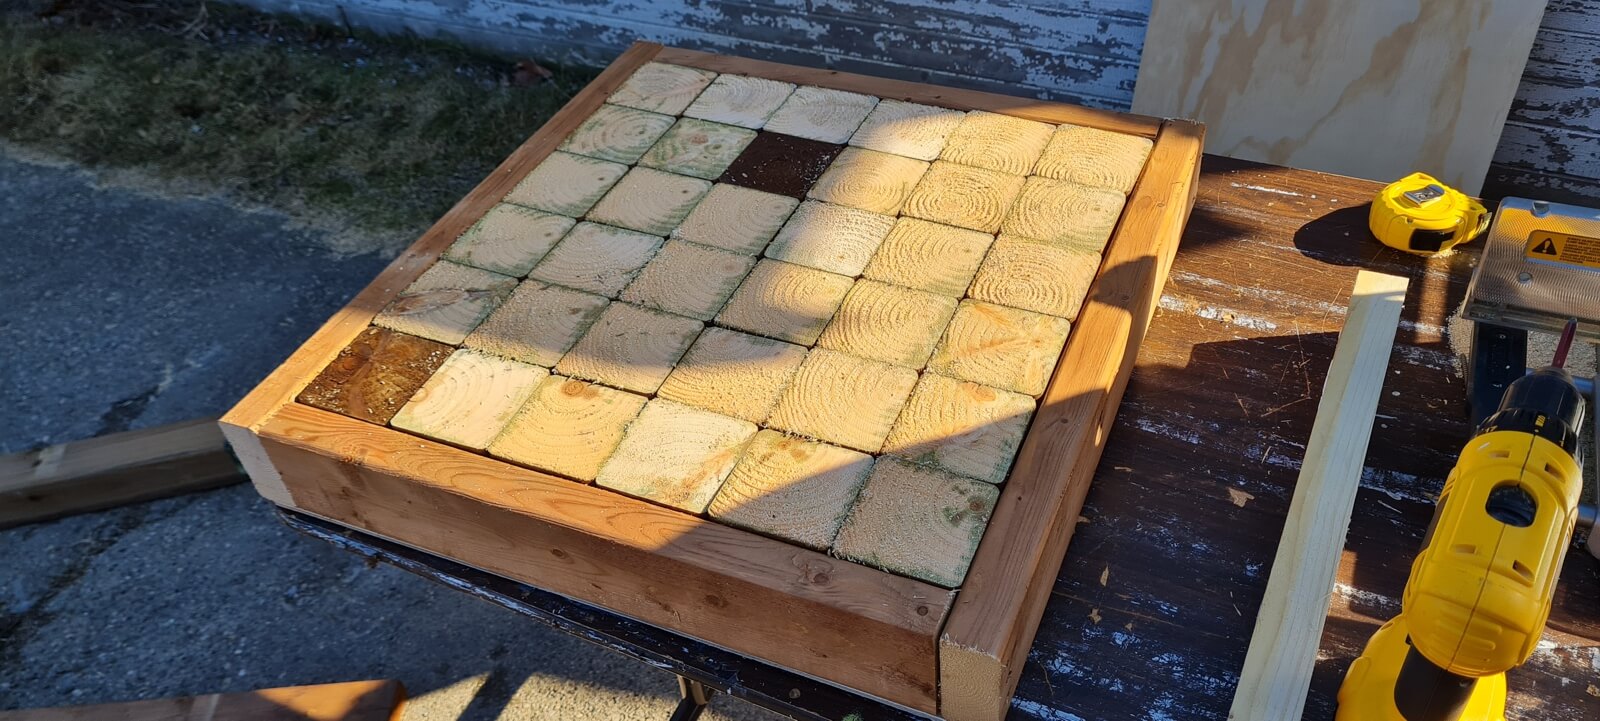
Next, layout the 4x4 pieces in rows of 6. until you have 6 rows of 6 pieces each row. Make sure all the pieces are standing upright so that the cut edges make the face of the target area. Not all lumber is perfectly straight or free from knicks and cuts so some of the blocks may not be perfectly square. If that is the case you may want to move a few pieces around so they fit together tighter and evenly around the outer edge of the target. If you want to ensure a really tight fit, you are a better wood worker than me. This is where you will want to take your optional sandpaper and sand around the edges of every block making sure they are smooth and fit together nicely.
Step 3: Creating the Target Frame
Now, we will create the target frame out of the two 2x4's You will be cutting 2 different lengths. Two pieces will be 21” long or the width of the 4x4 row of 6 pieces for the top and bottom of the frame. If you don't have a really tight fit on your 4x4 squares you will want to take a measurement before you cut and adjust the measurement if necessary. The next two pieces for the sides which will be cut to the length of the 4x4 row + 3 inches (the width of two 2x4's) so that they extend and cover the ends of the top and bottom pieces you just cut. If the fit is tight they should be 24” each but it's always a good idea to lay them out and take a final measurement before you cut in case it needs a minor adjustment.
Step 4: Assemble the Frame
Now, with the inner pieces and the frames already laid out on your work table we want to screw the frame together using 2 1/2” - 3 1/2” deck or framing screws. I used deck screws because they are painted and will hold up in the elements if I decide to leave my target outside. When you assemble the frame you only want to screw the sides to the top and bottom. You don't want to put any screws through the inner target blocks. Try to get as tight a fit as you can and squeeze the blocks together. If you have long clamps you can take advantage of them here or you can do like I did and just go for it. Once the sides are all screwed and snug we are ready to put on a back board.
Step 5: Cut the backing board
The next step is to measure and cut your 1/4” or thicker backing board from a piece of plywood. You want to cover the entire area of the target from edge to edge. If everything went together tightly this should be a piece that measures 24” x 24”. Like the other steps, always take a measurement and then make your cut just in case you need to make adjustments. It doesn't have to fit perfectly but there has to be enough room to screw it to the frame all the way around the outside. You can use 1 1/2 “ deck or framing screws to do this. Use alot! The backing board is there to keep the inner target pieces from pushing out the back with the impact of the knives repeatedly striking the target.
Step 6: Draw a grid and screw in the blocks
Now you want to put one screw through the plywood in middle or near the middle... Lets just say middle-ish of all 36 inner target blocks. If all went well you should be able to draw a grid by measuring 5” in from the outer frame then making a mark with your pencil every 3 1/2”. Do this on every side then use your straight edge and draw the grid. Don't worry if measurements are slightly off. They don't have to be perfect here, you just want to make sure there is one screw in each block so the blocks don't bounce forward on impact, You can now add one 1 1/2” screw where each line intersects and you have done it! You are ready to start throwing!
FAQs
Q: Can I use different types of wood for the target board?
A: Yes, you can use different types of wood for the target board, but make sure it's durable and able to absorb the impact of the throwing knives.
Q: Can I make the target board smaller or larger?
A: Yes, you can adjust the size of the target board based on your preference, but make sure you size it according to the width and depth of the lumber available for ease of construction
Q: Can I use the target board for other types of throwing objects?
A: Yes, you can use the target board for other types of throwing objects, such as axes or tomahawks, as long as they are compatible with the size and thickness of the target face. For axes you may want to make the frame out of 2x6 or 2x8 instead of 2x4 and adjust the target pieces thickness to match.
Conclusion

Building an end grain throwing knife target board is a fun and rewarding project that can enhance your throwing skills and provide hours of entertainment. By following the simple steps outlined in this guide, you can create a durable and efficient target board that will last for years to come. Remember to practice proper safety measures and maintenance to ensure a safe and enjoyable throwing experience.